Deploy to HoloLens 2
This page describes how to deploy your Unity Project with MRTK3 onto a HoloLens 2.
We strongly recommend using Holographic remoting for rapid iteration and testing on HoloLens 2, which allows for instant testing on the device without the need for compile + deploy.
Deployment Prerequisites
-
Add MRTK to your project and ensure your project settings are configured correctly to use the OpenXR pipeline and MRTK’s feature set. These features are required to deploy your project onto your HoloLens.
If starting from the template project, these project settings should already be configured for you.
-
Navigate to File > Build Settings.
-
Under Platform, select Universal Windows Platform. Switch the platform to Universal Windows Platform, and wait for the operation to finish.
-
Navigate to Edit > Project Settings.
-
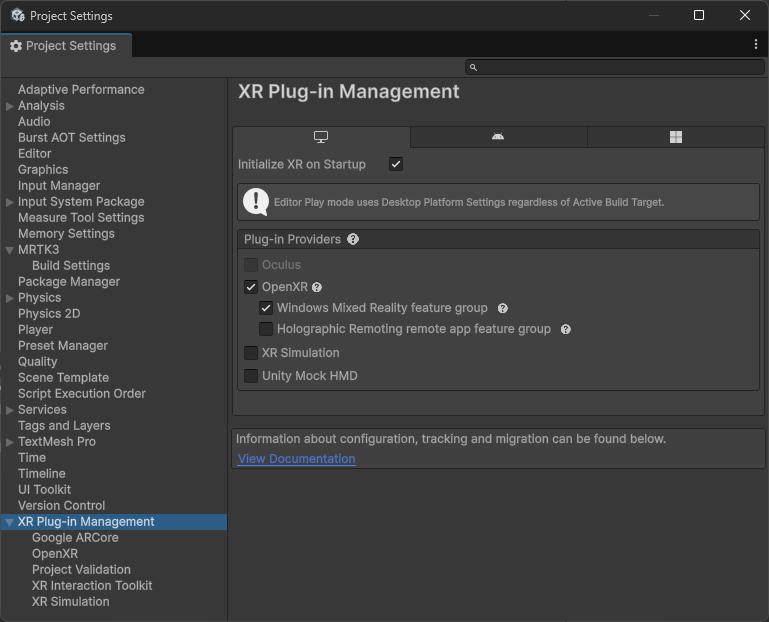
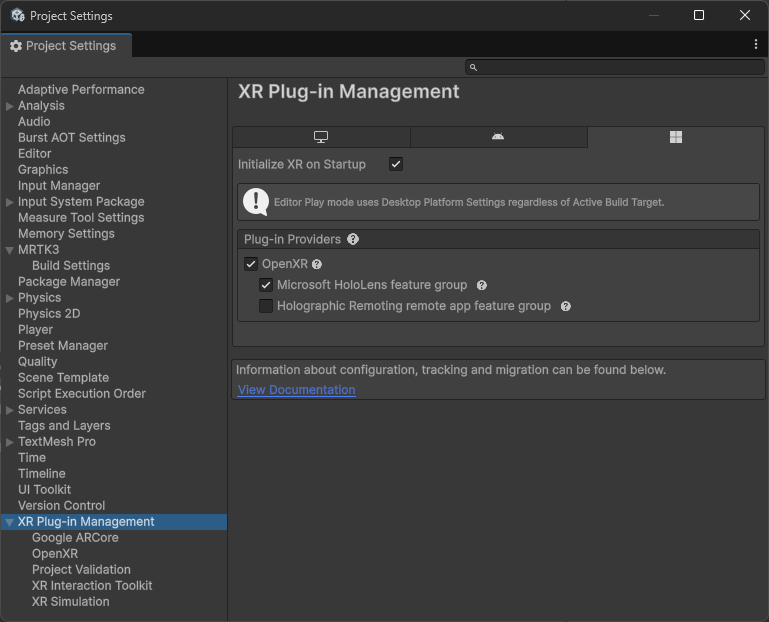
Under Project Settings, navigate to XR Plug-in Management and enable OpenXR under both the Standalone and UWP tabs. Under each tab, ensure that Initialize XR on Startup is selected and that the Windows Mixed Reality feature group under Standalone and the Microsoft HoloLens feature group under UWP are enabled.
If you don’t see these feature groups, ensure the Mixed Reality OpenXR Plugin is imported into your project.
For standalone:
For UWP:
A yellow warning icon may appear after checking the OpenXR option. Click that icon to open the OpenXR Project Validation tool. Click Fix All and ignore the interaction profile issue that can’t be auto-fixed. The profiles will be added in the step below.
-
Under Project Settings, navigate to XR Plug-in Management > OpenXR > Interaction Profiles and ensure the following profiles are listed based on the MRTK features you’d like to use:
Profile MRTK Eye Gaze Interaction Profile For eye tracking input Hand Interaction Profile For articulated hand input Microsoft Motion Controller Profile For controller input -
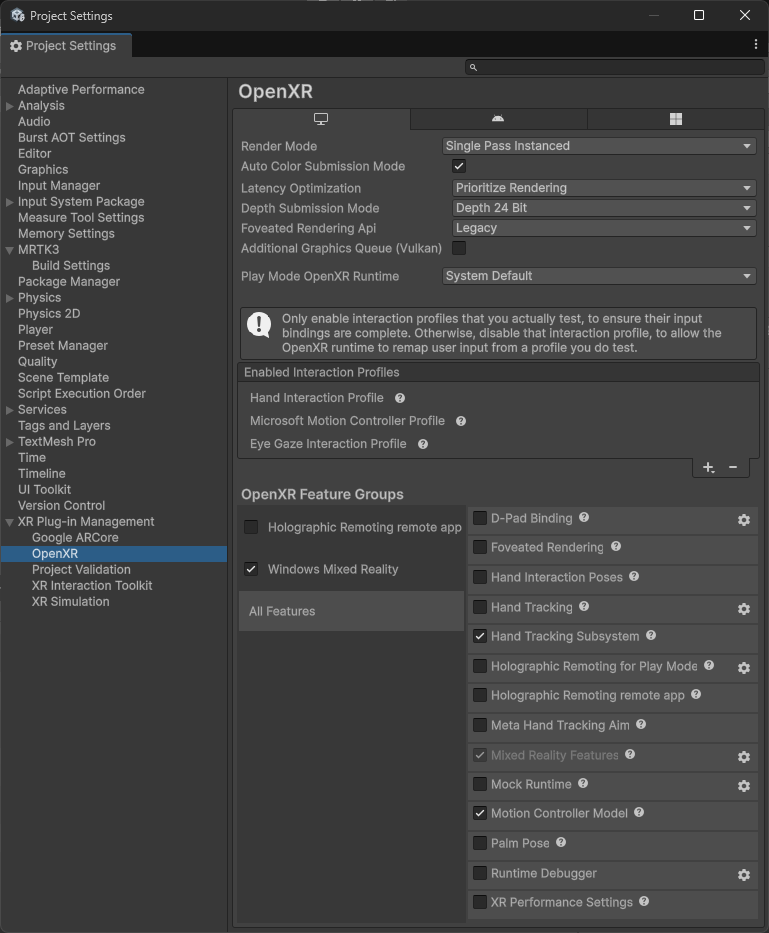
Under Project Settings, navigate to XR Plug-in Management > OpenXR > OpenXR Feature Groups and ensure the following features are checked under All Features based on the MRTK features you’d like to use (these are likely to be already checked after selecting the feature groups above):
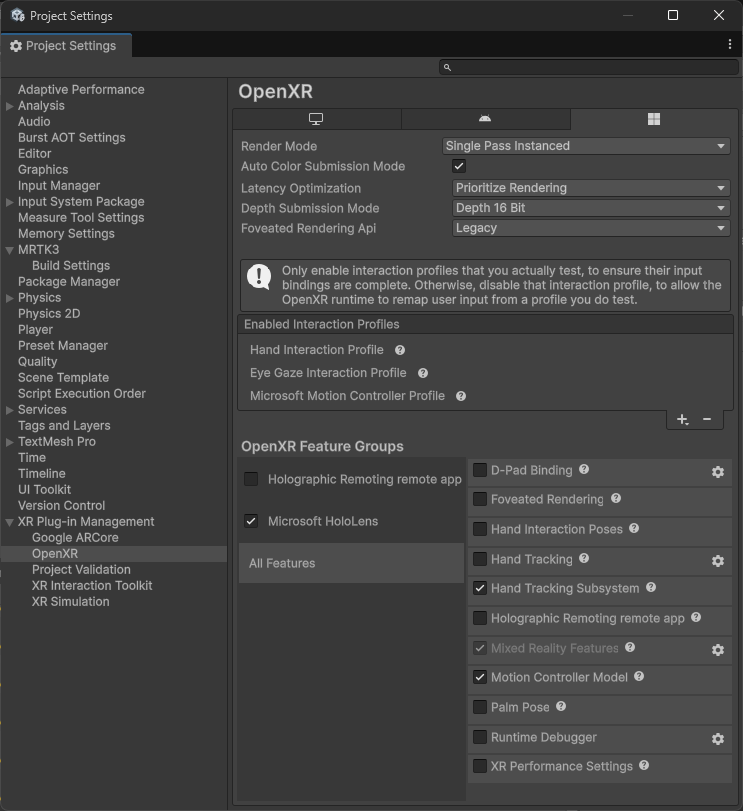
Feature MRTK Hand Tracking Subsystem For rendering the articulated hand joints Mixed Reality Features For general HoloLens and WMR support Motion Controller Model For rendering the motion controller models For standalone:
For UWP:
You can enable additional features as needed, but in-scene support for them will come from other packages, like AR Foundation.
-
For HoloLens 2, we recommend that you set Depth Submission Mode to 16-bit in the settings above.
-
For immersive headsets, you can use 24-bit depth submission. See the Microsoft development docs for Unity for more info.
-
A yellow warning icon or red error icon may appear during this process. Click that icon to open the OpenXR Project Validation tool. Select Fix All to address the issues. There may be several items to address. For more information about Windows App Capabilities, see App capability declarations


Using platform controller models
Controller models are stored in a format that is not natively supported by Unity. To use MRTK Controller Visualization on WMR, you will need to make sure you have the following package in your project:
- glTFast importer which enables the use of glTF asset files in Unity and allows the use of MRTK Controller Visualization on WMR
If you started with the MRTK3 template project, this package has already been included in the project. If not, an MRTK project validation rule will help you import the package.
Deploying to Device
-
After you have the project configured, proceed to Build the Unity Project.
-
Once built, you’ll need to deploy the project through Visual Studio.